You might be tempted to start using it as soon as possible, but a word of caution: this may mean you’re without access to some of your favourite apps or vulnerable to viruses and other malware. Frustrating as it may be, it’s worth taking a while to get your laptop, desktop PC or even tablet set up properly. It’ll save you a lot of hassle further down the line and ensure all your important data remains safe and secure. This tutorial focuses on Windows, with methods for both Windows 10 and Windows 11. The process on Apple’s macOS is slightly different – see our sister site Macworld for a detailed tutorial.
Step 1 – Power on
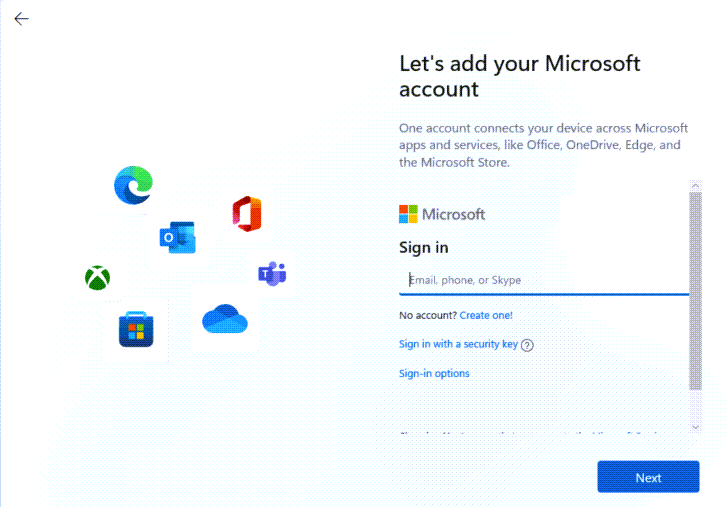
It sounds extremely obvious, but you can’t get anywhere without turning on your device. The power button is almost universally indicated as a small vertical line within a circle, but where it’s located will different by model. On laptops, the most common position is at the top-right of the keyboard, while desktops vary between the front and back of the monitor or computer case. Once that’s taken care of, you’ll then need to go through the first-time setup process. On Windows 10, you’ll have to select your region and language, agree to the licence terms, personalise the colour scheme, choose a name for your PC, choose a Wi-Fi network, decide whether to accept the so-called “express settings” or customise, and log in to your Microsoft account. The process is more streamlined on Windows 11, with just region, language, Wi-Fi and privacy settings required. Just follow the instructions on the screen and it should be fairly straightforward. You may be offered a subscription to Xbox Game Pass, but it’s easy to decline. You can technically still set up Windows without a Microsoft account on Windows 11 or 10, but it’s not recommended. You’ll miss out on features such as OneDrive cloud storage, the Microsoft Store and the pre-installed Mail app. But even if you decide against OneDrive, it’s definitely worth using a cloud storage service rather than relying on local files alone.
Step 2 – Remove bloatware
In all probability, your new machine will come pre-loaded with all sorts of software that you won’t want. Some of it might just be useful but, for most people, the phrase “bloatware” is a good description because these trial programs use up space on your hard disk and might slow down your PC. To see what’s already installed on Windows 10, open the Start menu (Windows logo in the bottom left), then the cog icon to open Settings. From there, head to System > Apps to a find a list of all the programs you have on your device. It might surprise you how much there is, considering you’ve only just set it up. Click any app you’re sure you don’t want anymore, then click ‘Uninstall’. It may uninstall automatically, or launch a wizard to let you do just that. Repeat for each app you’d like to remove. On Windows 11, the process is slightly simpler. Open Settings via the Start menu or searching for it, then choose Apps > Installed apps. For any you’d like to remove, click the three dots next to its listed size and choose ‘Uninstall’. However, if you’re unsure about anything, the best policy is to leave it while you do some research about what its actual purpose is. Antivirus software can be safely removed (provided you’re replacing it with another one), but leave most things relating to the processors or manufacturer of your device.
Step 3 – Install multiple apps at once
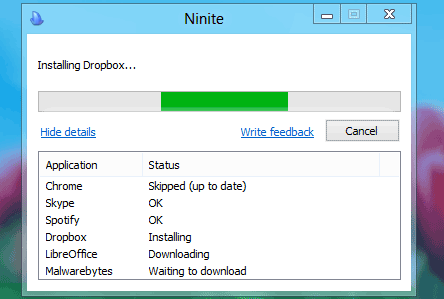
You might have an idea of the first few apps you’ll want to install, but what if you could download most of the main ones all at once? That’s what the program Ninite offers, and it’s completely free for Windows 10 and 11. Just head to the Ninite website and tick the box next to each app you’d like to install – my choices would be Chrome, Dropbox, Zoom, Spotify, Audacity and Malwarebytes. Then, just click ‘Get Your Ninite’ from the bottom of the page, and a custom installer will be downloaded for you. If any of these apps are already installed, they’ll be updated to the latest version. This makes it an easy way to make sure key apps are always up to date. Convenient as it may be, though, don’t be tempted to select stuff that you’re probably not going to use. After all, it doesn’t make a lot of sense to rid your new PC with bloatware, only to then add a load more unwanted software.
Step 4 – Install individual apps
Ninite might be good for installing a good selection of utilities and free packages, but if you have expensive software that you bought for your old computer and use regularly, you’ll probably want it on your new device. We’re not talking about free apps that are widely available here – they can easily be downloaded at any time. Most people use the likes of Microsoft Word or Adobe Photoshop via a subscription these days, whether it’s Microsoft 365 or Adobe Creative Cloud. But new standalone versions of Microsoft Office apps are released every few years, while older Adobe apps could be purchased subscription-free. Your existing licences will probably allow you to install it on your new computer (provided you’re not limited to one device), but what if you can’t login or have forgotten the licence key. It’s worth contacting the customer support teams from the company who makes the app in question, but there are other potential solutions. Magical Jellybean and Belarc Advisor are free utilities that are able to extract the licence key from many (but not all) popular packages. Run the utility on your old device to discover the necessary keys before attempting to re-install the software on your new one. If all else fails, it’s worth considering the free alternatives to popular apps. LibreOffice and Google Docs work well as word processors, while GIMP or the web-based Pixlr E do a good job of basic photo editing.
Step 5 – Tweak settings
There are loads of different customisation options, but it’s worth getting some set up straight away. One example is default apps – the ones which will open when you click a link, play music, view photos or access your emails. If you don’t like the defaults of Mail, Media Player, Photos and more, these can all be easily changed. On Windows 10, head to Settings > Apps > Default apps. Click the currently selected default for any category, then choose one of the alternatives. The example below shows the default Microsoft Edge browser swapped for Google Chrome, a change many users will want to make. On Windows 11, things work a bit differently. Here, you choose the default for a specific file type, or choose defaults on an app-by-app basis. Head to Settings > Apps > Default apps to make your picks. However, that’s just the tip of the iceberg when it comes to customisation on Windows. Head to Settings > Personalization in Windows 10 and 11 and see what you like the look of. One key area that you might like to customise is the Start menu, and we have separate tutorials for both versions of the operating system:
How to customise the Start Menu on Windows 11How to customise the Start Menu on Windows 10
Step 6 – Transfer files from your old device
You’ll certainly want to transfer your various documents, music, videos and photos from your old computer. The easiest way to do that is via OneDrive, Microsoft’s cloud storage system that’s directly integrated into Windows 10 and 11. After backing up everything to OneDrive to your old device, it simply requires you to sign-in with your account details and download the data to your new laptop or PC. A full guide to this can be found on the Microsoft website. It might be tempting to copy everything to your new device, but that’s not the best approach as there may be some clutter you can get rid of. Take this as an opportunity for a good spring clean, deleting any files you don’t need any more. Don’t forget about the Downloads folder either, which rarely has anything you’ll need to copy over.
Step 7 – Sort out a backup strategy
Having spent all this time getting your new computer setup exactly as you like it, it’s would be nightmare if all this hard work was lost. The key to avoiding that ever happening is to create an image of your disk drive on an external storage device, which you can then use to restore it later. This can be achieved via Control Panel, a legacy app that’s still available on Windows 10 and 11. Open it, then choose ‘Backup and Restore (Windows 7)’ under the ‘System and Security’ heading. Click ‘Set up backup’ and follow the instructions, choosing the storage device you have connected as the destination. Alternatively, you can use a third-party tool such as AOMEI Backupper. Acronis Cyber Protect Home Office is even more capable, but costs $49.99/£34.99 per year. See the best portable hard drives you can buy to make sure you get a reliable one. However, this should be used in addition to the backup options within Settings, rather than as a replacement. On the Windows 10 app, head to Update & Security > Backup and ensure ‘Automatically back up files’ is turned on. Learn more in our separate guide on how to back up Windows 10. In Windows 11, it’s Accounts > Windows backup and choose ‘Manage sync settings’ next to ‘OneDrive folder syncing’ That’s it! Your laptop or PC is now ready to go. It might feel like a long process, but it’s worth it and only needs to be done once. As the resident expert on Windows, Senior Staff Writer Anyron’s main focus is PCs and laptops. Much of the rest of his time is split between smartphones, tablets and audio, with a particular focus on Android devices.